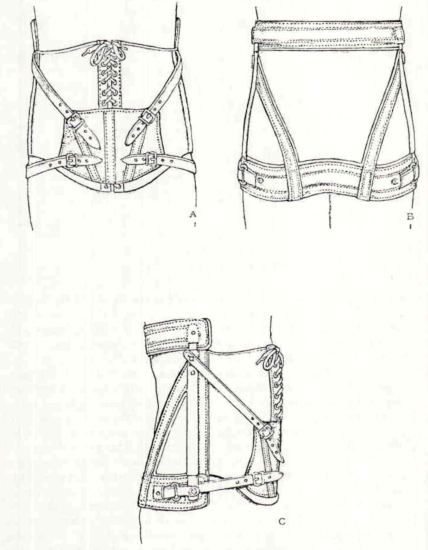
Figure 2. The Williams Brace (from 2).
Close Window